ในบทความนี้
In this post
จากโพสต์ที่แล้วเราเรียนรู้ Docker ว่ามันช่วยให้เรา pack app + dependencies ไว้ใน Container เดียว ทำให้ deploy ได้ทุกที่
แต่ถ้าเรามี Container เป็น สิบ... ร้อย... พัน ตัวล่ะ? ใครจะมานั่งสั่ง docker run ทีละตัว? 😵
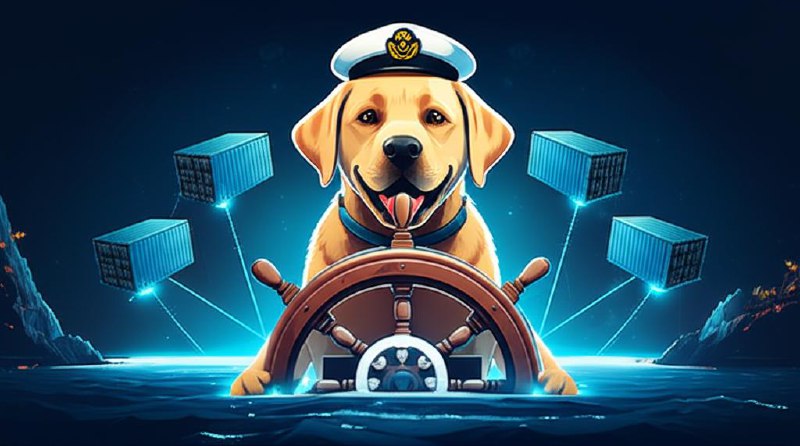
นี่คือปัญหาที่ Kubernetes (K8s) มาแก้ — มันเป็น Container Orchestrator ที่ช่วยจัดการ container ให้ทำงานร่วมกันอย่างเป็นระบบ เหมือนกัปตันเรือที่คุมตู้สินค้า (container) ทั้งลำ ⚓🐕
Kubernetes คืออะไร?
Kubernetes (อ่านว่า คู-เบอร์-เน-ทิส, ย่อว่า K8s) คือ open-source container orchestration platform ที่พัฒนาโดย Google ปัจจุบันดูแลโดย CNCF
หน้าที่หลักคือ:
- จัดวาง Container — เลือกว่า container ไหนรันบนเครื่องไหน (Scheduling)
- Scaling — เพิ่ม/ลด container ตาม traffic อัตโนมัติ
- Self-healing — container ตาย? K8s สร้างตัวใหม่ทันที
- Load Balancing — กระจาย traffic ให้เท่าๆ กัน
- Rolling Updates — อัปเดตแอปโดยไม่ downtime
💡 จำง่ายๆ: Docker = สร้าง Container | Kubernetes = จัดการ Container
ทำไมต้อง Kubernetes?
Docker Compose ก็จัดการหลาย containers ได้ แล้วทำไมต้อง K8s? คำตอบคือ Compose ทำงานบน เครื่องเดียว แต่ K8s ทำงานบน หลายเครื่อง (cluster) — auto-scaling, self-healing, rolling updates, service discovery ทั้งหมดอัตโนมัติ ลองนึกภาพว่าเรามี web app ที่ใช้ 3 services:
รวม 10 containers — ถ้าจัดการด้วยมือจะต้อง:
- สั่ง
docker runทีละตัว - ถ้า container ตาย ต้อง restart เอง
- Traffic เพิ่ม? ต้อง scale เอง
- Deploy version ใหม่? ต้องหยุดทีละตัว
Kubernetes ทำทั้งหมดนี้ให้อัตโนมัติ! 🚀
K8s Architecture — มีอะไรอยู่ข้างใน?
Kubernetes cluster แบ่งเป็น 2 ส่วนหลัก — Control Plane (สมอง — ตัดสินใจว่า Pod ไหนรันที่ไหน, ดูแล desired state) กับ Worker Nodes (แรงงาน — รัน containers จริง) Control Plane มักมี 3 เครื่องเพื่อ HA ส่วน Worker Nodes มีได้ไม่จำกัด เพิ่ม nodes = เพิ่ม capacity:
Control Plane (สมอง)
Control Plane มี 4 components หลัก: API Server (ประตูหน้าเดียว — kubectl, dashboard ทุกอย่างผ่านตัวนี้), etcd (key-value store เก็บ state ทั้งหมดของ cluster), Scheduler (ตัดสินใจว่า Pod ใหม่ไปรันที่ Node ไหน), Controller Manager (ดูแลว่า actual state = desired state):
- API Server — ประตูหน้าบ้าน ทุกคำสั่งต้องผ่านตรงนี้
- Scheduler — เลือกว่า Pod ไหนจะรันบน Node ไหน
- Controller Manager — ดูแลให้ state ตรงกับที่เรากำหนด
- etcd — ฐานข้อมูลที่เก็บ config ทั้งหมดของ cluster
Worker Node (แรงงาน)
แต่ละ Worker Node มี 3 components: kubelet (agent ที่รับคำสั่งจาก Control Plane แล้วจัดการ Pods), kube-proxy (จัดการ networking ภายใน cluster), Container Runtime (containerd/CRI-O — ตัวรัน containers จริง):
- kubelet — agent ที่รันบนทุก Node คอยดูแล Pod
- kube-proxy — จัดการ networking ให้ Pod คุยกันได้
- Pod — หน่วยที่เล็กที่สุดใน K8s (ข้างในมี container)
K8s Core Concepts — คำศัพท์ที่ต้องรู้
K8s มีศัพท์เฉพาะเยอะ แต่ core concepts ที่ต้องเข้าใจมีไม่กี่ตัว — Pod (หน่วยเล็กที่สุดใน K8s ห่อ 1+ containers), Deployment (จัดการ Pods — scaling, rolling updates), Service (ทำให้ Pods มี stable endpoint), Ingress (route traffic จาก internet เข้า Services) เข้าใจ 4 ตัวนี้ก็เริ่มใช้ K8s ได้แล้ว:
| Concept | คืออะไร | เปรียบเทียบ |
|---|---|---|
| Pod | หน่วยเล็กสุด (1+ containers) | ห้องพัก 1 ห้อง |
| Deployment | จัดการ Pod ให้มีจำนวนตามที่กำหนด | ผู้จัดการโรงแรม |
| Service | เปิดทางให้เข้าถึง Pod ได้ | ประตูทางเข้า |
| Node | เครื่อง (physical/VM) ที่รัน Pod | ตึกอาคาร |
| Namespace | แบ่งกลุ่ม resources | ชั้นของตึก |
| ConfigMap | เก็บ config (key-value) | ป้ายติดห้อง |
| Secret | เก็บข้อมูลลับ (encoded) | ตู้เซฟ |
| Ingress | จัดการ HTTP routing จากภายนอก | ล็อบบี้โรงแรม |
Hands-on — Deploy แอปแรกด้วย K8s
มาลองใช้จริง! ขั้นตอนหลักคือ: สร้าง Deployment (บอกว่ารัน image อะไร กี่ replicas) → สร้าง Service (expose ให้เข้าถึงได้) → Scale (เพิ่ม/ลด replicas) → Update (เปลี่ยน version โดยไม่ downtime)
1. สร้าง Deployment
Deployment YAML กำหนด: replicas (กี่ Pods), image (Docker image ไหน), resources (CPU/Memory limits), readinessProbe (ตรวจว่า Pod พร้อมรับ traffic ก่อน route เข้ามา) สังเกตว่าเป็น declarative — บอก "ต้องการอะไร" ไม่ใช่ "ทำอะไร":
apiVersion: apps/v1
kind: Deployment
metadata:
  name: my-web-app
  labels:
    app: web
spec:
  replicas: 3          # รัน 3 pods
  selector:
    matchLabels:
      app: web
  template:
    metadata:
      labels:
        app: web
    spec:
      containers:
      - name: web
        image: nginx:alpine
        ports:
        - containerPort: 80
        resources:
          requests:
            memory: "64Mi"
            cpu: "100m"
          limits:
            memory: "128Mi"
            cpu: "250m"
# สร้าง deployment
kubectl apply -f deployment.yaml
# ดูสถานะ
kubectl get pods
# NAME READY STATUS RESTARTS AGE
# my-web-app-6d8f7b4c5-abc12 1/1 Running 0 10s
# my-web-app-6d8f7b4c5-def34 1/1 Running 0 10s
# my-web-app-6d8f7b4c5-ghi56 1/1 Running 0 10s2. สร้าง Service
Service ทำให้ Pods มี stable IP/DNS name — เพราะ Pods มาและไป (scale, crash, update) แต่ Service address คงที่เสมอ มี 3 types: ClusterIP (ภายใน cluster), NodePort (expose port บน Node), LoadBalancer (สร้าง cloud LB อัตโนมัติ):
apiVersion: v1
kind: Service
metadata:
  name: web-service
spec:
  type: LoadBalancer
  selector:
    app: web         # เชื่อมกับ Pod ที่มี label app=web
  ports:
  - port: 80         # port ที่เปิดให้ภายนอก
    targetPort: 80   # port ของ container
# สร้าง service
kubectl apply -f service.yaml
# ดู service
kubectl get svc
# NAME TYPE CLUSTER-IP EXTERNAL-IP PORT(S)
# web-service LoadBalancer 10.96.45.123 203.0.113.50 80:31234/TCP3. Scaling — เพิ่ม/ลด Pod
Scale ได้ง่ายมาก — แค่แก้ replicas แล้ว K8s สร้าง/ลบ Pods ให้อัตโนมัติ หรือใช้ HPA (Horizontal Pod Autoscaler) ให้ scale ตาม CPU/Memory usage อัตโนมัติ:
# Scale เป็น 5 pods
kubectl scale deployment my-web-app --replicas=5

# ดูผล
kubectl get pods
# จะเห็น 5 pods running!
4. Rolling Update — อัปเดตโดยไม่ downtime
Rolling Update คือฟีเจอร์ที่ทำให้ K8s โดดเด่น — เมื่อ update image version K8s จะค่อยๆ สร้าง Pod ใหม่ (version ใหม่) แล้วลบ Pod เก่าทีละตัว ถ้า Pod ใหม่ fail จะ rollback อัตโนมัติ — zero downtime deployment:
# เปลี่ยน image เป็น version ใหม่
kubectl set image deployment/my-web-app web=nginx:1.25

# ดูสถานะ update
kubectl rollout status deployment/my-web-app
# Waiting for deployment "my-web-app" rollout to finish...
# deployment "my-web-app" successfully rolled out

# ผิดพลาด? Rollback!
kubectl rollout undo deployment/my-web-app
Self-healing — K8s ซ่อมตัวเอง
Self-healing คือฟีเจอร์ที่ทำให้ K8s แตกต่างจาก Docker Compose — ถ้า Pod crash, Node ล่ม, หรือ health check fail K8s จะ detect และสร้าง Pod ใหม่อัตโนมัติ ไม่ต้องมีคนมานั่ง monitor แล้ว restart เอง ทำงาน 24/7 ไม่มีวันหยุด:
# ลอง kill pod ทิ้ง
kubectl delete pod my-web-app-6d8f7b4c5-abc12

# ดูอีกที — K8s สร้างตัวใหม่มาแทนแล้ว!
kubectl get pods
# my-web-app-6d8f7b4c5-xyz99   1/1     Running   0          3s  ← ตัวใหม่!
# my-web-app-6d8f7b4c5-def34   1/1     Running   0          5m
# my-web-app-6d8f7b4c5-ghi56   1/1     Running   0          5m
🐕 K8s จำ "desired state" ไว้เสมอ: เราบอกว่าต้องการ 3 pods → ถ้าเหลือ 2 มันจะสร้างเพิ่มจนครบ 3 เอง!
Docker Compose vs Kubernetes
คำถามที่พบบ่อย — "ควรใช้ Compose หรือ K8s?" ไม่ใช่เรื่องของ "ตัวไหนดีกว่า" แต่เป็น "ต้องการอะไร" — Compose เหมาะกับ single server, dev environment, small apps ส่วน K8s เหมาะกับ production ที่ต้อง scale, HA, multi-team:
| Feature | Docker Compose | Kubernetes |
|---|---|---|
| เหมาะกับ | Development, เครื่องเดียว | Production, หลายเครื่อง |
| Scaling | Manual | Auto-scaling ได้ |
| Self-healing | ❌ ไม่มี | ✅ อัตโนมัติ |
| Load Balancing | ต้องตั้งเอง | Built-in |
| Rolling Update | ❌ ต้อง down | ✅ Zero-downtime |
| ความซับซ้อน | ง่าย | ซับซ้อนกว่า |
| Config ไฟล์ | docker-compose.yml |
YAML manifests |
💡 กฎง่ายๆ: Dev ใช้ Docker Compose, Production ใช้ Kubernetes
เริ่มต้นลองเล่น K8s
ไม่ต้องมี cluster จริงก็ลองได้! มี tools สำหรับรัน K8s บนเครื่องตัวเอง — เหมาะกับการเรียนรู้และ development แนะนำเริ่มจาก minikube (ง่ายที่สุด) หรือ kind (K8s ใน Docker — เร็วมาก):
- Minikube — K8s บนเครื่องตัวเอง (แนะนำสำหรับมือใหม่)
- Kind — K8s ใน Docker container
- K3s — K8s เวอร์ชันเบาๆ สำหรับ Raspberry Pi / Edge
- Docker Desktop — เปิด K8s ได้ในตัว (Settings → Kubernetes → Enable)
# ติดตั้ง minikube แล้วเริ่ม cluster
minikube start

# ลอง deploy
kubectl create deployment hello --image=nginx
kubectl expose deployment hello --port=80 --type=NodePort

# เปิดดูในเบราว์เซอร์
minikube service hello
สรุป
Kubernetes คือ industry standard สำหรับ container orchestration — ทุก cloud provider รองรับ (EKS, AKS, GKE) และเป็นทักษะที่ DevOps engineers ต้องมี เรียนรู้ curve สูง แต่เมื่อเข้าใจแล้วจะเห็นว่ามันแก้ปัญหาจริงๆ ที่ Docker เดี่ยวๆ ทำไม่ได้:
- Kubernetes = Container Orchestrator ที่จัดการ deploy, scale, heal อัตโนมัติ
- Pod = หน่วยเล็กสุด | Deployment = จัดการ Pod | Service = เปิดทางเข้า
- Control Plane = สมอง (API Server, Scheduler, etcd) | Worker Node = แรงงาน (kubelet, pods)
- Self-healing + Auto-scaling + Rolling Updates = ฟีเจอร์หลักที่ทำให้ K8s จำเป็นใน Production
- Docker Compose สำหรับ dev, Kubernetes สำหรับ production
- เริ่มเล่นง่ายๆ ด้วย Minikube หรือ Docker Desktop ⚓🐕
In the previous post we learned Docker — how it lets us pack an app plus its dependencies into a single Container so we can deploy it anywhere.
But what if we have tens... hundreds... thousands of Containers? Who is going to sit there running docker run one at a time? 😵
This is the problem Kubernetes (K8s) came to solve — it is a Container Orchestrator that keeps your containers working together as a system, like a ship's captain in command of every cargo container on board ⚓🐕
What Is Kubernetes?
Kubernetes (pronounced koo-ber-NET-eez, abbreviated K8s) is an open-source container orchestration platform developed by Google and now stewarded by the CNCF
Its main jobs are:
- Placing Containers — deciding which container runs on which machine (Scheduling)
- Scaling — adding and removing containers automatically as traffic changes
- Self-healing — a container died? K8s creates a new one immediately
- Load Balancing — spreading traffic evenly
- Rolling Updates — updating the app with no downtime
💡 An easy way to remember it: Docker = build Containers | Kubernetes = manage Containers
Why Kubernetes?
Docker Compose can manage several containers too, so why K8s? Because Compose runs on one machine, while K8s runs across many machines (a cluster) — auto-scaling, self-healing, rolling updates and service discovery, all automatic. Picture a web app made of 3 services:
That is 10 containers — and managing them by hand would mean:
- Running
docker runonce per container - Restarting a container yourself whenever one dies
- Traffic up? Scaling by hand
- Deploying a new version? Stopping each container one at a time
Kubernetes does all of this automatically! 🚀
K8s Architecture — What Is Inside?
A Kubernetes cluster has 2 main halves — the Control Plane (the brain — it decides which Pod runs where and maintains the desired state) and the Worker Nodes (the labour — they run the actual containers). The Control Plane usually has 3 machines for HA, while the number of Worker Nodes is unlimited: more nodes = more capacity:
Control Plane (the brain)
The Control Plane has 4 main components: the API Server (the single front door — kubectl, the dashboard, everything goes through it), etcd (the key-value store holding the cluster's entire state), the Scheduler (which decides which Node a new Pod runs on) and the Controller Manager (which keeps the actual state equal to the desired state):
- API Server — the front door; every command has to pass through here
- Scheduler — picks which Pod runs on which Node
- Controller Manager — keeps the state matching what we declared
- etcd — the database holding the cluster's entire configuration
Worker Node (the labour)
Each Worker Node has 3 components: kubelet (the agent that takes orders from the Control Plane and manages the Pods), kube-proxy (which handles networking inside the cluster) and the Container Runtime (containerd/CRI-O — what actually runs the containers):
- kubelet — the agent that runs on every Node and looks after its Pods
- kube-proxy — handles the networking that lets Pods talk to each other
- Pod — the smallest unit in K8s (with containers inside it)
K8s Core Concepts — The Vocabulary You Need
K8s has a lot of its own vocabulary, but the core concepts you have to understand are only a handful — Pod (the smallest unit in K8s, wrapping 1+ containers), Deployment (which manages Pods — scaling, rolling updates), Service (which gives Pods a stable endpoint) and Ingress (which routes traffic from the internet into Services). Understand those 4 and you can start using K8s:
| Concept | What it is | Think of it as |
|---|---|---|
| Pod | The smallest unit (1+ containers) | A single guest room |
| Deployment | Keeps the Pod count at the number you declared | The hotel manager |
| Service | Opens a way to reach the Pods | The entrance door |
| Node | The machine (physical/VM) that runs the Pods | The building |
| Namespace | Partitions resources into groups | A floor of the building |
| ConfigMap | Holds config (key-value) | The sign on the door |
| Secret | Holds sensitive data (encoded) | The safe |
| Ingress | Handles HTTP routing from outside | The hotel lobby |
Hands-on — Deploy Your First App with K8s
Let's try this for real! The main steps are: create a Deployment (say which image to run, and how many replicas) → create a Service (expose it so it can be reached) → Scale (add or remove replicas) → Update (change version with no downtime)
1. Create a Deployment
The Deployment YAML declares: replicas (how many Pods), image (which Docker image), resources (CPU/Memory limits) and readinessProbe (checking that a Pod is ready before traffic is routed to it). Notice that it is declarative — it says "what we want", not "what to do":
apiVersion: apps/v1
kind: Deployment
metadata:
  name: my-web-app
  labels:
    app: web
spec:
  replicas: 3          # run 3 pods
  selector:
    matchLabels:
      app: web
  template:
    metadata:
      labels:
        app: web
    spec:
      containers:
      - name: web
        image: nginx:alpine
        ports:
        - containerPort: 80
        resources:
          requests:
            memory: "64Mi"
            cpu: "100m"
          limits:
            memory: "128Mi"
            cpu: "250m"
# create the deployment
kubectl apply -f deployment.yaml
# check the status
kubectl get pods
# NAME READY STATUS RESTARTS AGE
# my-web-app-6d8f7b4c5-abc12 1/1 Running 0 10s
# my-web-app-6d8f7b4c5-def34 1/1 Running 0 10s
# my-web-app-6d8f7b4c5-ghi56 1/1 Running 0 10s2. Create a Service
A Service gives Pods a stable IP/DNS name — because Pods come and go (scaling, crashes, updates) while the Service address never changes. There are 3 types: ClusterIP (inside the cluster), NodePort (exposes a port on the Node) and LoadBalancer (creates a cloud LB automatically):
apiVersion: v1
kind: Service
metadata:
  name: web-service
spec:
  type: LoadBalancer
  selector:
    app: web         # connects to Pods labelled app=web
  ports:
  - port: 80         # the port exposed to the outside
    targetPort: 80   # the container's port
# create the service
kubectl apply -f service.yaml
# view the service
kubectl get svc
# NAME TYPE CLUSTER-IP EXTERNAL-IP PORT(S)
# web-service LoadBalancer 10.96.45.123 203.0.113.50 80:31234/TCP3. Scaling — Adding and Removing Pods
Scaling is very easy — just change the replicas and K8s creates or deletes Pods for you. Or use an HPA (Horizontal Pod Autoscaler) to scale automatically with CPU/Memory usage:
# scale to 5 pods
kubectl scale deployment my-web-app --replicas=5

# see the result
kubectl get pods
# you will see 5 pods running!
4. Rolling Update — Updating with No Downtime
The Rolling Update is the feature that makes K8s stand out — when you update the image version, K8s gradually creates the new Pods (the new version) and deletes the old ones one at a time. If a new Pod fails it rolls back automatically — zero downtime deployment:
# change the image to the new version
kubectl set image deployment/my-web-app web=nginx:1.25

# watch the update status
kubectl rollout status deployment/my-web-app
# Waiting for deployment "my-web-app" rollout to finish...
# deployment "my-web-app" successfully rolled out

# something went wrong? Rollback!
kubectl rollout undo deployment/my-web-app
Self-healing — K8s Repairs Itself
Self-healing is the feature that separates K8s from Docker Compose — if a Pod crashes, a Node goes down or a health check fails, K8s detects it and creates a new Pod automatically. Nobody has to sit watching it and restart things by hand; it works 24/7 without a day off:
# try killing a pod
kubectl delete pod my-web-app-6d8f7b4c5-abc12

# look again — K8s has already made a replacement!
kubectl get pods
# my-web-app-6d8f7b4c5-xyz99   1/1     Running   0          3s  ← the new one!
# my-web-app-6d8f7b4c5-def34   1/1     Running   0          5m
# my-web-app-6d8f7b4c5-ghi56   1/1     Running   0          5m
🐕 K8s always remembers the "desired state": we said we want 3 pods → if only 2 are left, it creates more until there are 3 again!
Docker Compose vs Kubernetes
A common question — "should I use Compose or K8s?" It is not a matter of "which is better" but of "what do you need" — Compose suits a single server, a dev environment, small apps, while K8s suits production that has to scale, stay highly available and serve multiple teams:
| Feature | Docker Compose | Kubernetes |
|---|---|---|
| Best for | Development, one machine | Production, many machines |
| Scaling | Manual | Auto-scaling available |
| Self-healing | ❌ None | ✅ Automatic |
| Load Balancing | Set it up yourself | Built-in |
| Rolling Update | ❌ Needs downtime | ✅ Zero-downtime |
| Complexity | Simple | More complex |
| Config file | docker-compose.yml |
YAML manifests |
💡 A simple rule: Docker Compose for dev, Kubernetes for production
Getting Started with K8s
You do not need a real cluster to try it! There are tools for running K8s on your own machine — good for learning and for development. I would start with minikube (the easiest) or kind (K8s inside Docker — very fast):
- Minikube — K8s on your own machine (recommended for beginners)
- Kind — K8s inside a Docker container
- K3s — a lightweight K8s for Raspberry Pi / Edge
- Docker Desktop — has K8s built in (Settings → Kubernetes → Enable)
# install minikube, then start the cluster
minikube start

# try a deploy
kubectl create deployment hello --image=nginx
kubectl expose deployment hello --port=80 --type=NodePort

# open it in the browser
minikube service hello
Summary
Kubernetes is the industry standard for container orchestration — every cloud provider supports it (EKS, AKS, GKE) and it is a skill DevOps engineers are expected to have. The learning curve is steep, but once it clicks you see that it solves real problems Docker on its own cannot:
- Kubernetes = the Container Orchestrator that deploys, scales and heals automatically
- Pod = the smallest unit | Deployment = manages Pods | Service = opens the way in
- Control Plane = the brain (API Server, Scheduler, etcd) | Worker Node = the labour (kubelet, pods)
- Self-healing + Auto-scaling + Rolling Updates = the core features that make K8s necessary in Production
- Docker Compose for dev, Kubernetes for production
- Getting started is easy — Minikube or Docker Desktop ⚓🐕