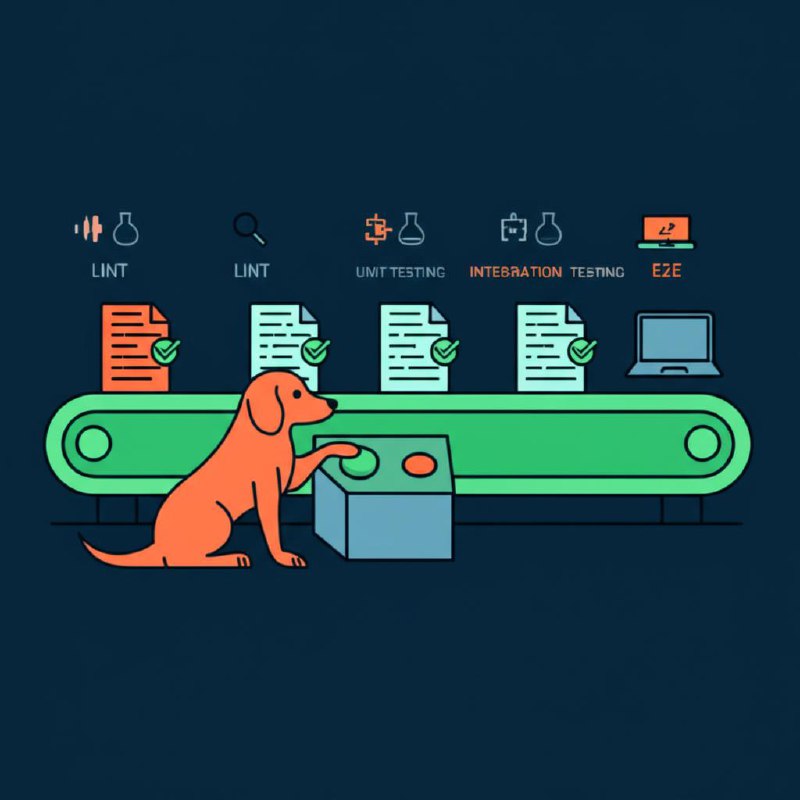
จากโพสต์ที่แล้วเราเรียน Code Quality & Review แต่ยังเป็น manual — วันนี้มาทำให้ ทุกอย่างอัตโนมัติ! ทุกครั้งที่ git push → ระบบทดสอบให้หมด ตั้งแต่ lint ไปจนถึง E2E 🧪🐕
Testing Pyramid + Static Analysis
ก่อนจะดำน้ำลงไปในแต่ละ level มาเข้าใจ Testing Pyramid กันก่อน — แนวคิดที่บอกว่าเราควรเขียน test แต่ละประเภทมากน้อยแค่ไหน ฐานล่างสุด (Unit Tests) ควรเขียนเยอะที่สุดเพราะเร็วและถูก ยิ่งขึ้นไปด้านบน (E2E Tests) ยิ่งควรเขียนน้อยลงเพราะช้าและแพง แต่ทุก level มีความสำคัญและขาดไม่ได้
⚡ Level 1: Static Analysis — เจอ bug โดยไม่ต้องรัน
Static Analysis คือการวิเคราะห์ code โดยไม่ต้อง "รัน" มัน — เหมือนการตรวจสอบสะกดคำก่อนส่งอีเมล เครื่องมือพวกนี้จะสแกน code ของคุณและบอกว่ามีปัญหาตรงไหน ตั้งแต่ตัวแปรที่ประกาศแล้วไม่ได้ใช้ ไปจนถึงช่องโหว่ด้านความปลอดภัย ข้อดีคือเร็วมาก (ไม่กี่วินาที) และเจอ bug ได้ก่อนที่ code จะถูกรัน
ESLint + Prettier + TypeScript
สามเครื่องมือนี้ทำงานร่วมกันเพื่อรักษาคุณภาพ code ใน JavaScript/TypeScript projects — ESLint หา bugs และ enforce coding rules, Prettier จัด format ให้สวยเหมือนกันทั้ง team, และ TypeScript ตรวจสอบ type safety เมื่อ setup ใน GitHub Actions ทุก PR จะถูกตรวจสอบอัตโนมัติ:
# .github/workflows/static-analysis.yml
name: Static Analysis
on: pull_request:

jobs:
  lint:
    runs-on: ubuntu-latest
    steps:
      - uses: actions/checkout@v4
      - uses: actions/setup-node@v4
        with:
          node-version: '20'
          cache: 'npm'
      - run: npm ci

      # ESLint — หา bugs + enforce rules
      - name: ESLint
        run: npx eslint . --format=json --output-file=eslint-report.json
        continue-on-error: true

      # Prettier — format check
      - name: Prettier
        run: npx prettier --check .

      # TypeScript — type check
      - name: Type Check
        run: npx tsc --noEmit

      # แสดงผลใน PR เป็น annotations
      - name: Annotate ESLint results
        if: always()
        uses: ataylorme/eslint-annotate-action@v3
        with:
          report-json: eslint-report.json
Python — Ruff + mypy
สำหรับ Python มี Ruff ซึ่งเป็น linter ตัวใหม่ที่เร็วกว่า flake8 + isort + black รวมกัน 10-100 เท่า (เขียนด้วย Rust) ส่วน mypy ทำหน้าที่ type checking เหมือน TypeScript ช่วยเจอ bug ที่เกิดจากการส่ง type ผิด:
  python-lint:
    runs-on: ubuntu-latest
    steps:
      - uses: actions/checkout@v4
      - uses: actions/setup-python@v5
        with:
          python-version: '3.12'

      # Ruff — lint + format (แทน flake8 + isort + black)
      - name: Ruff lint
        uses: astral-sh/ruff-action@v1
      - name: Ruff format check
        uses: astral-sh/ruff-action@v1
        with:
          args: "format --check"

      # mypy — type check
      - run: pip install -r requirements.txt
      - name: mypy
        run: mypy src/ --strict
GitHub CodeQL — Security Analysis (SAST)
CodeQL คือ SAST (Static Application Security Testing) tool ของ GitHub ที่วิเคราะห์ code เพื่อหาช่องโหว่ด้านความปลอดภัย เช่น SQL Injection, XSS, Path Traversal ฟรีสำหรับ public repos และแสดงผลลัพธ์เป็น annotation ตรง line ที่มีปัญหาใน PR เลย — เหมือนมี security expert review code ให้อัตโนมัติ:
# .github/workflows/codeql.yml
name: CodeQL Security Analysis
on:
  push:
    branches: [main]
  pull_request:
  schedule:
    - cron: '0 6 * * 1'                 # ทุกวันจันทร์

jobs:
  analyze:
    runs-on: ubuntu-latest
    permissions:
      security-events: write
    strategy:
      matrix:
        language: ['javascript-typescript', 'python']
    steps:
      - uses: actions/checkout@v4
      - uses: github/codeql-action/init@v3
        with:
          languages: ${{ matrix.language }}
          queries: +security-extended
      - uses: github/codeql-action/autobuild@v3
- uses: github/codeql-action/analyze@v3| Severity | CodeQL ตรวจจับ |
|---|---|
| 🔴 Critical | SQL Injection, XSS, Path Traversal, Command Injection |
| 🟠 High | Hard-coded credentials, Missing authentication, Input validation |
| 🟡 Medium | Incomplete URL validation, Weak cryptography, Missing CSRF |
💡 CodeQL ฟรีสำหรับ public repos! ผลแสดงใน Security tab + annotation ใน PR
🧪 Level 2: Unit Tests — ทดสอบทีละ function
Unit Tests คือการทดสอบ function หรือ class ทีละตัวแบบแยกส่วน (isolated) โดยไม่พึ่ง database, API, หรือ external services เป้าหมายคือยืนยันว่า "ถ้าใส่ input นี้ ต้องได้ output นั้น" Unit tests เป็นฐานล่างสุดของ pyramid — เขียนเยอะ, รันเร็ว (ไม่กี่วินาที), และเจอ bug ได้ตั้งแต่เนิ่นๆ
Jest (TypeScript)
Jest เป็น testing framework ยอดนิยมสำหรับ JavaScript/TypeScript ที่ครบครัน — มี test runner, assertion, mocking built-in ตัวอย่างด้านล่างแสดงการเขียน unit tests ที่ดี ครอบคลุมทั้ง happy path, edge cases, และ error handling:
// src/utils/calculator.ts
export function calculateDiscount(price: number, percent: number): number {
  if (price < 0) throw new Error('Price cannot be negative');
  if (percent < 0 || percent > 100) throw new Error('Invalid discount');
  return price * (1 - percent / 100);
}

// src/utils/__tests__/calculator.test.ts
describe('calculateDiscount', () => {
  test('applies 20% discount', () => {
    expect(calculateDiscount(100, 20)).toBe(80);
  });

  test('0% discount returns full price', () => {
    expect(calculateDiscount(100, 0)).toBe(100);
  });

  test('100% discount returns 0', () => {
    expect(calculateDiscount(100, 100)).toBe(0);
  });

  test('rejects negative price', () => {
    expect(() => calculateDiscount(-100, 20)).toThrow('Price cannot be negative');
  });

  test('rejects invalid discount > 100', () => {
    expect(() => calculateDiscount(100, 150)).toThrow('Invalid discount');
  });
});
pytest (Python) — Parametrized Tests
สำหรับ Python, pytest เป็น framework ที่ทรงพลังด้วย fixtures (setup/teardown ที่ใช้ซ้ำได้) และ parametrized tests (ทดสอบหลาย cases ด้วย decorator ตัวเดียว) ช่วยลด code ซ้ำและครอบคลุม edge cases ได้ง่าย:
# tests/test_user_service.py
import pytest
from datetime import date
from src.services.user_service import User

class TestUser:
    @pytest.fixture
    def admin(self):
        return User("Alice", "[email protected]", date(1990, 5, 15), role="admin")

    def test_admin_can_access_dashboard(self, admin):
        assert admin.can_access("dashboard") is True

    def test_admin_can_access_settings(self, admin):
        assert admin.can_access("settings") is True

    # ทดสอบหลาย cases ด้วย parametrize
    @pytest.mark.parametrize("role,resource,expected", [
        ("admin", "dashboard", True),
        ("admin", "settings", True),
        ("editor", "dashboard", True),
        ("editor", "settings", False),
        ("member", "dashboard", True),
        ("member", "settings", False),
        ("guest", "dashboard", False),
    ])
    def test_role_permissions(self, role, resource, expected):
        user = User("Test", "[email protected]", date(2000, 1, 1), role=role)
        assert user.can_access(resource) is expected
GitHub Actions — Unit Tests + Coverage
เมื่อเขียน unit tests แล้ว ขั้นตอนถัดไปคือให้ GitHub Actions รันอัตโนมัติทุก PR พร้อมรายงาน coverage ว่า code ส่วนไหนยังไม่มี test ครอบคลุม สิ่งสำคัญคือการ setup ให้ test results แสดงเป็น annotation ใน PR และ coverage report แสดงเป็น comment:
# .github/workflows/unit-tests.yml
name: Unit Tests
on: pull_request:

jobs:
  test-js:
    runs-on: ubuntu-latest
    steps:
      - uses: actions/checkout@v4
      - uses: actions/setup-node@v4
        with: { node-version: '20', cache: 'npm' }
      - run: npm ci
      - run: npm test -- --coverage --reporters=default --reporters=jest-junit
        env:
          JEST_JUNIT_OUTPUT_DIR: reports/

      # แสดง test results ใน PR
      - name: Test Report
        if: always()
        uses: dorny/test-reporter@v1
        with:
          name: Jest Results
          path: reports/jest-results.xml
          reporter: jest-junit

      # Coverage comment ใน PR
      - uses: codecov/codecov-action@v4
        with:
          token: ${{ secrets.CODECOV_TOKEN }}
🔗 Level 3: Integration Tests — หลาย components ร่วมกัน
Integration Tests ทดสอบว่าหลาย components ทำงานร่วมกันได้จริง — เช่น API endpoint → business logic → database → response ต่างจาก unit tests ตรงที่ต้องมี "ของจริง" มาเกี่ยวข้อง (database, Redis, etc.) GitHub Actions รองรับ services ที่สร้าง PostgreSQL, Redis, MongoDB containers ให้อัตโนมัติ ทำให้เขียน integration tests ใน CI ได้ง่ายมาก:
# .github/workflows/integration-tests.yml
name: Integration Tests
on: pull_request:

jobs:
  api-tests:
    runs-on: ubuntu-latest
    # Services — DB + Cache พร้อมใช้ใน CI เลย!
    services:
      postgres:
        image: postgres:16
        env:
          POSTGRES_DB: testdb
          POSTGRES_USER: test
          POSTGRES_PASSWORD: testpass
        ports: ['5432:5432']
        options: --health-cmd pg_isready --health-interval 10s --health-retries 5
      redis:
        image: redis:7-alpine
        ports: ['6379:6379']
        options: --health-cmd "redis-cli ping" --health-interval 10s --health-retries 5

    steps:
      - uses: actions/checkout@v4
      - uses: actions/setup-node@v4
        with: { node-version: '20', cache: 'npm' }
      - run: npm ci
      - run: npm run db:migrate
        env: { DATABASE_URL: 'postgresql://test:testpass@localhost:5432/testdb' }
      - run: npm run db:seed:test
        env: { DATABASE_URL: 'postgresql://test:testpass@localhost:5432/testdb' }
      - run: npm run test:integration
        env:
          DATABASE_URL: postgresql://test:testpass@localhost:5432/testdb
          REDIS_URL: redis://localhost:6379
          JWT_SECRET: test-secret-key
        timeout-minutes: 10
API Integration Test Example
ตัวอย่างด้านล่างแสดง integration test ที่ทดสอบ Users API จริงๆ — สร้าง user, ดึงข้อมูล, ตรวจสอบ validation, ทดสอบ authentication สังเกตว่าใช้ supertest ส่ง HTTP request จริงไปที่ app และใช้ beforeAll/afterAll จัดการ database setup/teardown:
// tests/integration/api/users.test.ts
import request from 'supertest';
import { app } from '../../../src/app';

describe('POST /api/users', () => {
  test('creates a new user', async () => {
    const res = await request(app)
      .post('/api/users')
      .set('Authorization', `Bearer ${authToken}`)
      .send({
        name: 'Test User',
        email: '[email protected]',
        password: 'SecurePass123!',
      })
      .expect(201);

    expect(res.body.data).toMatchObject({
      name: 'Test User',
      email: '[email protected]',
    });
    // password ต้องไม่ return กลับมา
    expect(res.body.data).not.toHaveProperty('password');
  });

  test('rejects duplicate email', async () => {
    await request(app)
      .post('/api/users')
      .set('Authorization', `Bearer ${authToken}`)
      .send({ name: 'Dup', email: '[email protected]', password: 'Pass123!' })
      .expect(409);
  });

  test('validates required fields', async () => {
    const res = await request(app)
      .post('/api/users')
      .set('Authorization', `Bearer ${authToken}`)
      .send({ name: 'No Email' })
      .expect(400);

    expect(res.body.errors).toContainEqual(
      expect.objectContaining({ field: 'email' })
    );
  });
});
🌐 Level 4: E2E Tests — Playwright
End-to-End (E2E) Tests ทดสอบจากมุมมองผู้ใช้จริง — เปิด browser, กดปุ่ม, กรอกฟอร์ม, ตรวจว่าหน้าจอแสดงผลถูกต้อง Playwright เป็น E2E framework ที่ดีที่สุดในปี 2026 — เร็วกว่า Cypress, รองรับ multi-browser (Chrome, Firefox, Safari), มี auto-wait ที่ฉลาด, และถ่าย screenshot/video เมื่อ test fail อัตโนมัติ
⚠️ E2E tests อยู่บนสุดของ pyramid — ควรเขียนเฉพาะ critical paths เท่านั้น (login, checkout, registration) เพราะรันช้า (10-20 นาที) และ maintain ยาก ถ้าเขียนเยอะเกินไปจะ flaky และเสียเวลาแก้ test มากกว่าแก้ code จริง
# .github/workflows/e2e-tests.yml
name: E2E Tests
on:
  pull_request:
  push:
    branches: [main]

jobs:
  e2e:
    runs-on: ubuntu-latest
    timeout-minutes: 20
    services:
      postgres:
        image: postgres:16
        env: { POSTGRES_DB: e2e_test, POSTGRES_USER: test, POSTGRES_PASSWORD: test }
        ports: ['5432:5432']
        options: --health-cmd pg_isready --health-interval 10s

    steps:
      - uses: actions/checkout@v4
      - uses: actions/setup-node@v4
        with: { node-version: '20', cache: 'npm' }
      - run: npm ci
      - run: npx playwright install --with-deps chromium firefox
      - run: npm run start:test &
        env: { DATABASE_URL: 'postgresql://test:test@localhost:5432/e2e_test' }
      - run: npx wait-on http://localhost:3000 --timeout 30000
      - run: npx playwright test
      - uses: actions/upload-artifact@v4
        if: always()
        with:
          name: playwright-report
          path: playwright-report/
Playwright Test — Login + Shopping Cart
ตัวอย่างด้านล่างแสดง E2E tests สำหรับ 2 critical paths ที่สำคัญที่สุด — Authentication Flow (login, registration) และ Shopping Cart Flow (เพิ่มสินค้า, อัพเดทจำนวน, checkout) สังเกตว่าใช้ data-testid attributes สำหรับ selectors แทน CSS classes — เพราะ classes อาจเปลี่ยนได้ แต่ test IDs ตั้งมาเพื่อ testing โดยเฉพาะ:
// e2e/tests/auth.spec.ts
import { test, expect } from '@playwright/test';

test('successful login flow', async ({ page }) => {
  await page.goto('/login');
  await page.fill('[data-testid="email"]', '[email protected]');
  await page.fill('[data-testid="password"]', 'test123');
  await page.click('[data-testid="login-button"]');

  await expect(page).toHaveURL('/dashboard');
  await expect(page.locator('[data-testid="welcome-message"]'))
    .toContainText('Welcome, Admin');
});

test('shows error for invalid credentials', async ({ page }) => {
  await page.goto('/login');
  await page.fill('[data-testid="email"]', '[email protected]');
  await page.fill('[data-testid="password"]', 'wrong');
  await page.click('[data-testid="login-button"]');

  await expect(page.locator('[data-testid="error-message"]'))
    .toContainText('Invalid email or password');
});
// e2e/tests/shopping-cart.spec.ts
test('add items → update quantity → checkout', async ({ page }) => {
await page.goto('/products');
// Add item to cart
await page.locator('.product-card').first()
.getByRole('button', { name: 'Add to Cart' }).click();
await expect(page.locator('[data-testid="cart-badge"]')).toHaveText('1');
// Go to cart → update quantity
await page.click('[data-testid="cart-icon"]');
await page.fill('[data-testid="quantity-input"]', '3');
await page.click('[data-testid="update-cart"]');
// Checkout
await page.click('[data-testid="checkout-button"]');
await page.fill('#address', '123 Test St');
await page.click('[data-testid="place-order"]');
await expect(page.locator('[data-testid="order-confirmation"]')).toBeVisible();
await expect(page.locator('[data-testid="order-id"]')).toHaveText(/^ORD-\d+$/);
});Playwright Config — Multi-browser
Playwright config ด้านล่างแสดงการตั้งค่าที่สำคัญ — retries: 2 ใน CI ป้องกัน flaky tests, trace: 'on-first-retry' บันทึก trace สำหรับ debug, และ projects กำหนด browsers + devices ที่จะทดสอบ รวมถึง mobile viewport:
// playwright.config.ts
export default defineConfig({
  testDir: './e2e/tests',
  fullyParallel: true,
  retries: process.env.CI ? 2 : 0,       // retry 2 ครั้งใน CI
  reporter: [['html'], ['junit', { outputFile: 'reports/e2e-results.xml' }]],
  use: {
    baseURL: process.env.BASE_URL || 'http://localhost:3000',
    trace: 'on-first-retry',              // trace เมื่อ retry
    screenshot: 'only-on-failure',
    video: 'retain-on-failure',
  },
  projects: [
    { name: 'chromium', use: { ...devices['Desktop Chrome'] } },
    { name: 'firefox', use: { ...devices['Desktop Firefox'] } },
    { name: 'mobile-chrome', use: { ...devices['Pixel 5'] } },
    { name: 'mobile-safari', use: { ...devices['iPhone 13'] } },
  ],
});
🛡️ Level 5: Security Testing
นอกจาก functional testing แล้ว Security Testing ก็สำคัญไม่แพ้กัน — dependencies ที่ใช้อาจมีช่องโหว่, code อาจมี hardcoded secrets, Docker images อาจมี vulnerabilities การ setup security scanning อัตโนมัติใน CI จะช่วยเจอปัญหาเหล่านี้ก่อนที่จะถึง production
Dependabot — Auto-update Dependencies
Dependabot เป็น built-in feature ของ GitHub ที่สแกน dependencies และสร้าง PR อัตโนมัติเมื่อมี security patch หรือ version ใหม่ ช่วยให้ไม่ต้องตรวจสอบ dependencies ด้วยมือ:
# .github/dependabot.yml
version: 2
updates:
  - package-ecosystem: "npm"
    directory: "/"
    schedule:
      interval: "weekly"
      day: "monday"
    open-pull-requests-limit: 10
    labels: ["dependencies", "automated"]
    groups:
      dev-dependencies:
        dependency-type: "development"

  - package-ecosystem: "docker"
    directory: "/"
    schedule:
      interval: "weekly"

  - package-ecosystem: "github-actions"
    directory: "/"
    schedule:
      interval: "weekly"
Trivy + Gitleaks + License Check
นอกจาก Dependabot แล้ว ยังมี security tools อื่นที่ควร setup — Trivy สแกน vulnerabilities ใน source code และ Docker images, Gitleaks ตรวจจับ secrets ที่ถูก commit เผลอ (API keys, passwords), และ license-checker ตรวจว่า dependencies ไม่มี GPL license ที่อาจกระทบ commercial use:
# .github/workflows/security-scan.yml
jobs:
  source-scan:
    steps:
      - uses: actions/checkout@v4
      - uses: aquasecurity/trivy-action@master
        with:
          scan-type: 'fs'
          severity: 'CRITICAL,HIGH'
          exit-code: '1'                   # fail ถ้าเจอ CRITICAL

  secret-scan:
    steps:
      - uses: actions/checkout@v4
        with: { fetch-depth: 0 }
      - uses: gitleaks/gitleaks-action@v2
        env: { GITHUB_TOKEN: '${{ secrets.GITHUB_TOKEN }}' }

  license-check:
    steps:
      - uses: actions/checkout@v4
      - run: npm ci
      - run: npx license-checker --failOn "GPL-3.0;AGPL-3.0"
📊 Coverage Gates — บังคับ Coverage ขั้นต่ำ
Coverage Gates คือการตั้งกฎว่า "ถ้า test coverage ต่ำกว่า X% ห้าม merge" — ช่วยป้องกันไม่ให้ทีมเขียน code ใหม่โดยไม่มี tests Coverage ที่แนะนำคือ 80-90% สำหรับ code ทั่วไป และ 90-95% สำหรับ critical code เช่น auth, payments:
// jest.config.js
module.exports = {
  coverageThreshold: {
    global: {
      branches: 80,
      functions: 80,
      lines: 85,
      statements: 85,
    },
    // auth code ต้อง coverage สูงพิเศษ!
    './src/auth/': {
      branches: 90,
      functions: 90,
      lines: 95,
    },
  },
};
🔄 Complete Testing Pipeline
ถึงเวลารวมทุกอย่างเข้าด้วยกัน! Pipeline ด้านล่างแสดง complete testing workflow ที่ใช้ได้กับโปรเจกต์จริง — เริ่มจาก static analysis (เร็วที่สุด) แล้วค่อยๆ ไล่ขึ้นไปถึง E2E tests (ช้าที่สุด) โดยใช้ parallelism ให้เต็มที่เพื่อลดเวลารอ จาก 45 นาทีแบบ sequential เหลือแค่ ~15 นาทีแบบ parallel:
# Complete pipeline — key parts
concurrency:
  group: ${{ github.workflow }}-${{ github.ref }}
  cancel-in-progress: true          # cancel old runs ถ้า push ใหม่

jobs:
  static:   ...                      # lint + format + typecheck
  unit:
    needs: static
    strategy:
      matrix:
        shard: [1, 2, 3, 4]          # split tests 4 shards!
    steps:
      - run: npm test -- --shard=${{ matrix.shard }}/4

  integration:
    needs: static
    services:                         # Postgres + Redis
      postgres: ...
      redis: ...

  e2e:
    needs: [unit, integration]
    strategy:
      matrix:
        browser: [chromium, firefox]  # multi-browser parallel

  all-tests-pass:
    needs: [coverage, integration, e2e, security]
    if: always()                      # Gate: ทุก job ต้อง pass
Pipeline configuration ข้างต้นแสดงให้เห็นถึงการออกแบบ CI/CD ที่คำนึงถึง efficiency และ parallelism การใช้ concurrency groups ด้วย cancel-in-progress: true ป้องกันการ waste resources จาก outdated runs การใช้ needs dependencies เพื่อ control execution order และ matrix strategies เพื่อ parallelize workloads ช่วยให้ได้ optimal performance
การใช้ if: always() ใน gate job แสดงถึงการ implement proper quality gates ที่ require ทุก test stages ต้อง pass ก่อนที่จะ allow merge การ design pipeline เป็น stages ที่ clear dependencies ช่วยให้เข้าใจ flow และ debug issues ได้ง่าย การ balance ระหว่างความเร็วและความครอบคลุมเป็น art ที่ต้องปรับแต่งตาม project needs
⚡ Performance Tips
การ optimize performance ของ CI/CD pipeline เป็นการลงทุนที่คุ้มค่ามากเพราะช่วยลดเวลารอของ developer และค่าใช้จ่ายของ CI minutes การใช้ techniques ที่หลากหลายร่วมกันจะให้ผลลัพธ์ที่ดีที่สุด โดยแต่ละเทคนิคมี impact และความยากในการ implement ที่แตกต่างกัน การ prioritize optimizations ตาม cost-benefit ratio จะให้ ROI ที่ดีที่สุด
| Technique | Effect | How |
|---|---|---|
| Test Sharding | 3-4x faster | --shard=1/4 (Jest/Playwright) |
| Caching | 10x faster install | cache: 'npm' in setup-node |
| Concurrency | Cancel old runs | cancel-in-progress: true |
| Path Filtering | Skip unnecessary | dorny/paths-filter@v3 |
| fail-fast: false | See all failures | Don't stop on first fail |
ตารางข้างต้นแสดงให้เห็นถึงผลกระทบที่สำคัญของ performance optimization techniques แต่ละเทคนิคมี impact ที่แตกต่างกัน โดย test sharding และ caching มักให้ผลลัพธ์ที่ดีที่สุด เพราะช่วยลดเวลาที่ใช้จริงในการ execution
สิ่งสำคัญคือการเลือก optimization techniques ให้เหมาะสมกับ pipeline ของตนเอง การใช้ fail-fast: false อาจช้ากว่า แต่ให้ข้อมูลที่ครอบคลุมกว่าเมื่อมีปัญหาหลายจุดพร้อมกัน การ balance ระหว่างความเร็วและความครอบคลุมของข้อมูลเป็นสิ่งที่ต้องปรับให้เหมาะสมกับทีม
# Path filtering — รันเฉพาะ tests ที่เกี่ยวข้อง
- uses: dorny/paths-filter@v3
  id: filter
  with:
    filters: |
      backend:
        - 'src/api/**'
        - 'src/models/**'
      frontend:
        - 'src/components/**'
        - 'src/pages/**'

test-backend:
  needs: changes
  if: needs.changes.outputs.backend == 'true'
  # → ไม่รัน backend tests ถ้าแก้แค่ frontend!
Path filtering เป็นเทคนิคที่ทรงพลังมากในการลดเวลา CI โดยการรัน tests เฉพาะส่วนที่เกี่ยวข้องกับการเปลี่ยนแปลงจริง การใช้ dorny/paths-filter action ทำให้สามารถ detect file changes และตัดสินใจได้อัตโนมัติว่าควรรัน test suite ไหน การ configure path patterns ให้ครอบคลุมทั้ง direct dependencies และ indirect dependencies เป็นสิ่งสำคัญสำหรับความถูกต้อง
ประโยชน์ของ path filtering มีมากกว่าแค่ความเร็ว ยังช่วยลด noise ใน CI/CD logs และทำให้ developers มีความมั่นใจมากขึ้นว่าการเปลี่ยนแปลงของพวกเขาไม่ได้กระทบส่วนอื่นๆ ของระบบ แต่ต้องระวังการตั้งค่า dependency paths ให้ถูกต้อง เพื่อไม่ให้พลาด tests ที่สำคัญ การ balance ระหว่าง precision และ safety ใน path filtering ต้องปรับแต่งตาม architecture ของ codebase
เทคนิคอื่นๆ เช่น test sharding ช่วยลดเวลาโดยการแบ่ง test suite ออกเป็นส่วนย่อยที่รันแบบ parallel การใช้ caching อย่างมีประสิทธิภาพช่วยลดเวลาใน dependency installation และ build steps การ combine หลายเทคนิคร่วมกันมักให้ performance improvements ที่ significant กว่าการใช้เทคนิคเดียว
🔑 Key Takeaways
การสรุปสาระสำคัญของ automated testing ช่วยให้เห็นภาพรวมของความรู้ที่ได้รับและสามารถนำไปประยุกต์ใช้ได้อย่างมีประสิทธิภาพ แต่ละจุดที่กล่าวถึงล้วนมาจากประสบการณ์จริงและ lessons learned จาการ implement automated testing ในโปรเจกต์จริง
สิ่งสำคัญที่สุดคือการเริ่มต้นจากพื้นฐานที่แข็งแกร่ง แล้วค่อยๆ เพิ่มความซับซ้อน การมี testing pyramid ที่สมดุล static analysis ที่ครอบคลุม และ CI/CD pipeline ที่เร็วและเสถียรจะเป็น foundation ที่ดีสำหรับการ scale ระบบในอนาคต การลงทุนเวลาและความพยายามในการ setup เหล่านี้จะคืนผลกลับมาในรูปของ productivity และ code quality ที่เพิ่มขึ้น
- Testing Pyramid → Unit (เยอะ) > Integration (กลาง) > E2E (น้อย)
- Static analysis ก่อนเสมอ → เร็ว, เจอ bugs ตั้งแต่ก่อนรัน test
- CodeQL → free SAST สำหรับ public repos
- Services ใน Actions → Postgres/Redis/Mongo พร้อมใช้ใน CI เลย
- Playwright → E2E testing ที่ดีที่สุด — เร็ว, reliable, multi-browser
- Test sharding → แบ่ง tests รัน parallel → เร็วขึ้น 3-4x
- Coverage gates → บังคับ 80%+ coverage ห้ามลดลง
- Dependabot → auto-update dependencies + security patches
- Path filtering → ไม่ต้องรัน backend tests ถ้าแก้แค่ frontend
- concurrency + cancel-in-progress → ประหยัด CI minutes 🧪🐕